Showing posts with label acrylic. Show all posts

Monday, December 10, 2012

Full Sets At School :)

OMG you guys, I've been such a bad blogger!!!! Ironically, it's because I've been super busy with school- I've been taking the manicuring course at Paris Beauty College in Concord, CA and I haven't been able to finish my fall challenge or blog at all! Here are a couple of pictures of the acrylic full sets I've been doing at school the last few weeks. I don't know if I'll have a chance to blog again before school is over but I'm trying to continue to snap pictures if I can! 


This set is my hand model Chrissy's hands. She gets almond shaped nails because she's a vet tech and she wears gloves and has to pick up kitties by their necks and such. She loves 3D nail art of course and got tiny white bows on a few of her nails and clusters of multi colored half pearls on the rest. 


These are DUCK FEET nails. My first set of duck feet actually on someone else. In the beginning of school, I did a full set of duck feet on myself, but these were much better. Also, the girl that got these nails was going to homecoming that weekend so it made it super fun for me to do. I used forms instead of glue on nail tips to get this flared out look.

These are just fun two toned funky french acrylics with cut out stars embedded in the acrylic. I finally had to bring my drill to school because I think I'm getting RSI from hand filing. Sad, but it's so much fun doing acrylics at school. 


That's all for now, you guys, so hope I can get back to blogging once my busy busy schedule dies down a bit! 

Thursday, October 27, 2011

Red and Black Bunny Set - RIGHT Hand

Yay! I finally got to do a set of bunny nails!! I decided it was time to do my right hand over because they were empty for a few weeks! And I'm so glad I did because they turned out pretty snazzy for applying with my left (non-dominant) hand!!

On my middle finger, I put a bunch of 1.5 mm red rhinestones on because my black stars were not encased deep enough in clear acrylic and when I was filing my nails, I shaved off half of the large cutout star :-/

Here's all the stuff I used in this set ^^

My glitter mix was clear acrylic, red hexagons, silver tinsel glitter by Martha Steward in Sterling, and black fine glitter also by Martha Stewart in Onyx.

(My NYE 2010/11 nails were this mix minus red hexagons.)

Aaaand here's my bunny heads and stars in the cap waiting to be placed on my nail. :)

Saturday, October 22, 2011

Blue & Green Iridescent Glitter Star Acrylics (underside pic! yikes!)

 Ahhhh... finally my challenge is over and now it's time to get movin' on projects I've been neglecting; I have a few birthday presents to knock out and I have to start working on Christmas! (lol sorry to those who don't think farrrrr ahead, but the week before Halloween = it's Christmas time.)

I used a hot pink acrylic mixed with clear to make my nail bed color. I call it "Pinky Promise", I drilled out the area closest to the cuticle and only applied the pink there. It's really hard to see it in the pictures because of the lighting but the idea was to have it look REALLY pink at the very  base of the nail. See picture below:

For the tips, I drilled out the smile line and filed off the thick layer of clear acrylic I'd been painting on during this whole challenge (ew it was sooo stained and gross). Filled the tips with a mix of the Martha Stewart Iridescent Collection fine glitter and glitter stars, encased in clear, and shaped and buffed smooth. 

I'm going to eventually post this method for tip-fill and back-fill but most of my followers don't use acrylic (and if I'm wrong PLEASE correct me  Where the acrylic girls at!) 


This shot is just a "front"? view of my nails to show you how thick/thin they are with my actual nail + acrylic + glitter + stars + top acrylic + top coat. 

WARNING   WARNING   WARNING   WARNING   WARNING   WARNING
KINDA GROSS PICTURE COMING UP...

I'm only posting this shot because my twin bro and my boyfriend saw the undersides of my nails last night and were appalled to see that I'd had my acrylics on for SO LONG (Aug 30th - today) that the tips I originally glued on had grown out completely and all that was left was my natural nails underneath and you can see them EWWW! 

Does this make sense? Look at this picture:


Ew! those are my hella long and gross natural nails! They just have acrylic on top-- And the middle one is still yellowish from when I attempted water marbling during the challenge and it got green under my nail....

For the record I am removing these acrylics, cutting my natural nails, and reapplying a fresh set in about a week. But I had to show you my dirty little secret :(


Tuesday, October 18, 2011

Huge Post: Haul, Swatches, Reviews... (Pic Heavy)


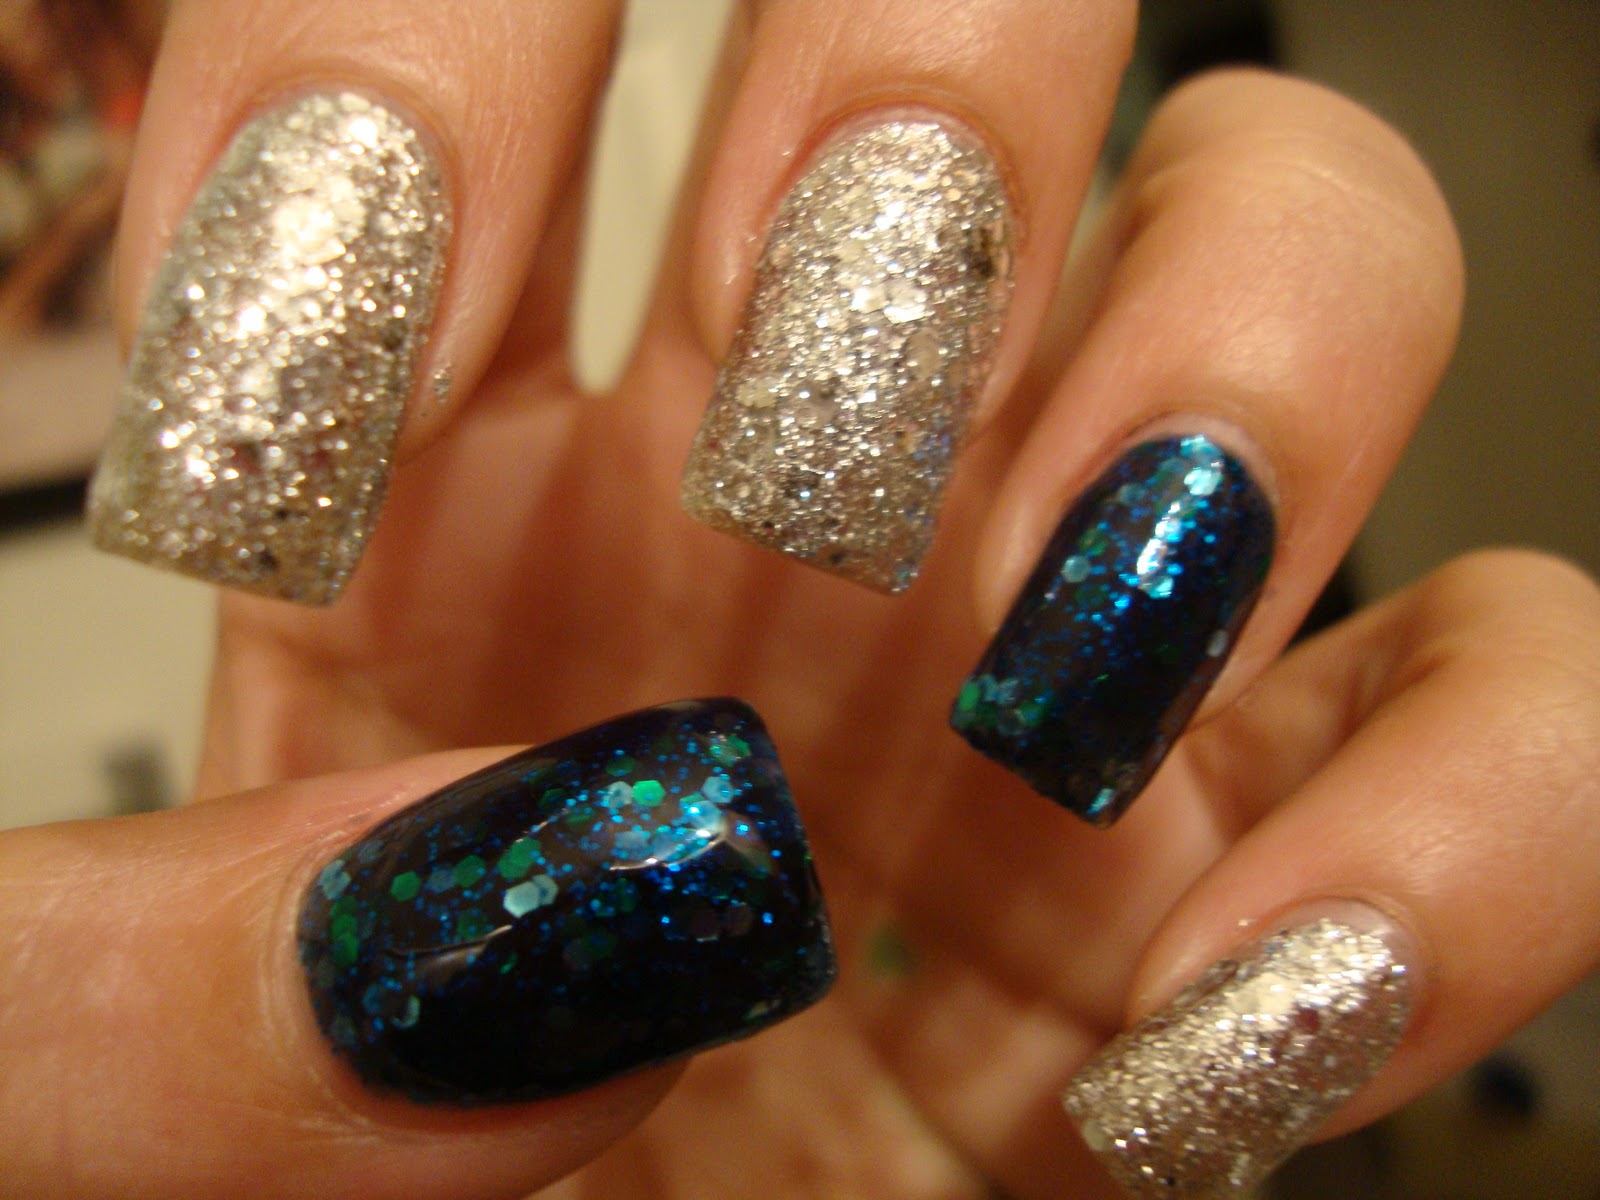
This is OPI's "Crown Me Already" from the Miss Universe Collection (the silver and large hex glitter). And the blue is "Across The Universe " by Deborah Lippmann.


OK let's start with 'Crown Me Already': I'm not sure if it was just this bottle, it's my friend Megan's and she ordered it online and she said when she recieved it a little bit had leaked out a bit. Not sure if it was a little think because of the insane amount of glitter, or because of the leak, but it was pretty hard to apply, and seemed to PUSH more polish out of the bottle each time I put the brush back in. I love the glitter, love the sparkle, but it was pretty hard to smooth out the texture, even with Seche Vite top coat. I also used a toothpick to push the large hexagon glitters around to keep my cuticle line clean looking.


"Across the Universe" is a dream glitter polish. It only took 2 medium coats to opaque and despite it being loaded with hexagons, it went on smooth, and had a jelly-like finish. It was smoothed out instantly with only one coat of Seche Vite. This is also Megan's polish. I got to swatch these while dog-sitting her super awesome golden retriever, Lady. Hey Megan!


YAY 3D acrylic! I'll go into details about that further down the page, as this is a swatch review for Essie's "Raise Awareness". It's Essie's breast cancer awareness pink and it is a lil tricky. I did read another review of this polish saying it was streaky and it is. I feel like when I'm painting tips it's even streakier vs. whole nail application. So this is two coats. I love the color, it would be less streaky with 3 coats, but I don't like to have heavy looking tips. I think that this polish would be less streaky in 3-4 months as it ages and becomes a little thicker.


Here is my pink nail drill I just got yesterday from Beauties Factory. Check it out here. I got it for about $25, and actually this is my replacement drill for the one I just got last month and BROKE. Now for this review I would like to make it clear that I BROKE the drill the first time. It did not come malfunctioning. Good news: the BF pink drill has a one year warranty, and this one was sent to me for $10 fee and I got to keep my other drill, it's cable, and drill bits. As for it's power: it goes up to 20,000 RPM (super fast and powerful) but so far I haven't had to use it at it's max speed; it does the job on medium. I've successfully filed a nail I had to put on today, and carved out the moon tips from my squared off nails. It did a fine job, my tips are sharp and more defined that with my previous battery powered drill. See above, the moon tips in my Essie "Raise Awareness" pictures. The only down side I have seen with this drill so far: it gets pretty warm in my hand after long use, and once it has overheated and slowed down. I turned it off for about 5 minutes, and was able to use it just fine again. I would reccomend this to any beginners for use on home acrylic application. And these are my acrylic brushes that I got JUST for doing 3D kawaii japanese nail art!!! and this 12 color set of acrylic powder. The colors are pretty random, but I'm not too picky about that right now these are just for practicing 3D stuff. I only paid about $2.50 for the 5 brush set (free shipping) and $6 or so for the acrylics also free shipping. It only took about 2 weeks to get here from China, and they are good enough quality to do a few little bows and flowers.


The website is here and it's insanely cheap for decent quality nail stuff like rhinestones, glitter, etc. So you should DEFINITELY check it out. Free shipping from China to US and came in a super decent amount of time. The comtainer that the acrylics came it was a little dusty (as shown) but I just dusted it off with a paper towel after I saw how yuck it was in the photo. None of it was spilled in shipping, but it was just a little dusty with powder. The brushes are super cute and the bristles are a nice soft sable hair for acrylic application, and they clean as well as my expensive ones from Sally's.


Well, if anyone read this whole thing, kudos to you, and I hope this was helpful for someone!