Showing posts with label blue. Show all posts

Tuesday, October 15, 2013

Paradise Blue Cheetah and Gilty Gold Zebra

 I'm attempting to paint my nails as often as possible during my break from piano. I raided my roommate Ashley's np stash and found two new favorites: "Paradise" by Sinful Colors and "Gilty Pleadure" by Sally Hansen Complete Manicure. Paradise is a bright creamy sky blue which I can only imagine is even more beautiful in the daytime. I sit here admiring it in artificial light and can't wait for the sun to come up. I'll have to update you all with a daytime pic soon. It was two coats to full opacity. The first thin coat was streaky and I almost started to doubt my decision on picking a Sinful Colors polish out of her stash instead of a higher quality. But I was thankfully reassured by a thicker 2nd coat which brought the color to a dreamlike consistency. Gilty Pleasure is a champagne gold I used to make a couple streaks in my last post. I love it and it's so perfect on any skin color. Again it's two coats to opaque but with a light color like this, three should be perfect. I don't like to do three coats because, frankly, ain't no one got time fo that. 
I was a little disappointed in myself for not thinking outside the box and reverting to animal print. I promise my next post won't be something I've done a thousand times over. Hope you enjoy!

Welcome Back! Almond Acrylics in Fall Colors

Hello, my darlings! I am back and super excited to be blogging again. After nail school I went through a tremulous move back to Oakland and wasn't able to blog for a while. So here's my first set back: an almond shaped acrylic set with three base colors: OPI Don't Pretzel My Buttons, Essie School of Hard Rocks and  OPI Over the Taupe. I added a 1mm rhinestone to the DPMB and SHR and on the OTT I did 3 slashes of Sally Hansen Complete Manicure in Gilty Pleasure and a black art polish. I'm going to try really hard to blog more often- I've missed all of you and thank you so much for visiting during my hiatus!! See you soonsies <3 


Monday, July 2, 2012

Bye, Bye, Birdie

My hand model, Oddrey came over with an idea for these swallow or birds flying silhouettes. I looked up a couple pictures of bird silhouettes and decided on this design. Just two coats of a white creme, and painted these on with this dark teal color my gf Megan brought me from China. It doesn't have a name but I will swatch and post a picture of the bottle in another post! Enjoi.

Sunday, June 17, 2012

Americana Nails <3

Ya, I know I'm a lil early, but the 4th of July is my favorite holiday do I'm going to start doing my red, white, and blues now!

Just a simple stars and striped funky French. Blue tips with white stars stamped from the 1st Konad plate on the thumb and index; white tips with shakily painted red stripes on the pinky, ring and middle. All detailed with a delicate outline of silver glitter to hide the imperfect smile lines. More USA nails to come!

Thursday, December 29, 2011

NYE Mani #2

Ahhh... Much better. A NYE mani worthy of drinking and smooching the night away. I used "School of Hard Rocks" by Essie as a base color.  Then did a suuuper thin French tip in blueish glitter "Nail Junkie" by Sinful Colors. You can barely see it in the picture, but it looks awesome in person. I used a silver striper polish to do these little bursts coming from the corners of my nail bed. In the center of the silver bursty thing, I put a tiny silver rhinestone surrounded by tiny silver hexagons. Wish I could find my camera cord so I could upload better pictures of everything! Sorry!

Wednesday, December 21, 2011

Christmas / Winter Mani #2

So this is basically a redo of my Xmas mani #1 from yesterday. I just did the same design in different colors because my nail polish fell off in whole pieces!

I used Sinful Colors Snow Me White as a base, sponged on China Glaze For Audrey in the middle and Wet N Wild NERDS Need Love Too on the tips. Dotted on some silver and blue hex glitter, a coat of Sally Hansen Diamonds, a coat of Sally Hansen Strobelight glitter, and Seche Vite on top.

Thursday, November 10, 2011

Fimo Fruits and Rhinestone Flowers (Pic Heavy!)

I finally got around to using my Fimo fruit slices! I've had them for a really long time and I've been dying to try them out! When I sat down to give me boring white French tips a fill, I had no idea what I was in for...

After my backfill, I drilled the tips super thin, but they were still white tips, so I had to cover them up with some color. I used a combination of blue, green, and pink iridescent hexagon glitters, lightly, just to add some color. The white remains as the base color. I topped with some fruit slices, mostly kiwi, strawberry, lemon, lime, Fuji apple, and watermelon. Then encased with a THICK layer of clear acrylic. (filed, shaped, and buffed, yadah yadah yadah...)

And added some colorful flowers made from rhinestones!

These are the things I used: the pink, green, and blue hex, Fimo fruit slice wheel, and 2 sizes of multi colored rhinestones: 1.5 mm and 2 mm, which I adhered at the very end with a lil top coat (after 3 coats of top coat on each nail dried)

Because I was just applying the fruits to the tips, there isn't much space to have a variety of the full shapes. I used a craft knife to slice some of the fruit in half.

(Carefully)! I did this to the limes, lemons, and the strawberries. It allowed for more fruit to be placed on each nail, and they laid a bit better on the nail too!
 
Here are all the fruits that came in my Fimo wheel (which I got for about $5 at Sally Beauty Supply). The ones I know for sure are lemon, strawberry, kiwi, 2 watermelons, lime, leaves, apple, and Fuji apple. The ones I'm not sure about are papaya, kumquat, and banana. But they are so weird looking that I'm not sure what they look like and I probably won't be using them. ><


Let me know what you guys think!! They are busy, but they are super shiny and the rhinestone flowers sparkle really nicely, especially in dim light. I'm digging it!

Friday, November 4, 2011

Essie School of Hard Rocks Swatch

Ahhh I've had this polish for a few weeks now and haven't gotten a chance to swatch it out because my crap long acrylics and my 30 day challenge. But here's the scoop: School of Hard Rocks from Essie's Winter 2011 Collection is a creamy, slate blue/green/grey polish that glides on smooth and opaque in just 2 coats. I was sorta worried as it's been sitting upright in its drawer for at least 3 weeks and it had already settled at the thin liquidy stuff rose to the top. I gave it an extra few shakes and it was good as new. The first coat was transparent and streaky, but it coulda just been me, as my hands are very badly sore from 3 straight days of crocheting Xmas presents. I love the color, it is such a new shade of blue/grey/green (lol) that I really haven't seen before. I instantly felt like it was winter and it made me feel very warm inside. The only problem I have with this polish: when I was applying top coat, the polish started to rub off onto the top coat brush!!! And I'd had my nails dried for nearly 45 minutes! Maybe it was just this top coat, I'll let you guys know next time when I use a different top coat. But my review stands: this is a great new color!! I love it, and can't wait to try the other Winter 2011's from Essie!

Saturday, October 22, 2011

Blue & Green Iridescent Glitter Star Acrylics (underside pic! yikes!)

 Ahhhh... finally my challenge is over and now it's time to get movin' on projects I've been neglecting; I have a few birthday presents to knock out and I have to start working on Christmas! (lol sorry to those who don't think farrrrr ahead, but the week before Halloween = it's Christmas time.)

I used a hot pink acrylic mixed with clear to make my nail bed color. I call it "Pinky Promise", I drilled out the area closest to the cuticle and only applied the pink there. It's really hard to see it in the pictures because of the lighting but the idea was to have it look REALLY pink at the very  base of the nail. See picture below:

For the tips, I drilled out the smile line and filed off the thick layer of clear acrylic I'd been painting on during this whole challenge (ew it was sooo stained and gross). Filled the tips with a mix of the Martha Stewart Iridescent Collection fine glitter and glitter stars, encased in clear, and shaped and buffed smooth. 

I'm going to eventually post this method for tip-fill and back-fill but most of my followers don't use acrylic (and if I'm wrong PLEASE correct me  Where the acrylic girls at!) 


This shot is just a "front"? view of my nails to show you how thick/thin they are with my actual nail + acrylic + glitter + stars + top acrylic + top coat. 

WARNING   WARNING   WARNING   WARNING   WARNING   WARNING
KINDA GROSS PICTURE COMING UP...

I'm only posting this shot because my twin bro and my boyfriend saw the undersides of my nails last night and were appalled to see that I'd had my acrylics on for SO LONG (Aug 30th - today) that the tips I originally glued on had grown out completely and all that was left was my natural nails underneath and you can see them EWWW! 

Does this make sense? Look at this picture:


Ew! those are my hella long and gross natural nails! They just have acrylic on top-- And the middle one is still yellowish from when I attempted water marbling during the challenge and it got green under my nail....

For the record I am removing these acrylics, cutting my natural nails, and reapplying a fresh set in about a week. But I had to show you my dirty little secret :(


Thursday, October 20, 2011

30 Day Nail Challenge - Day 28 - Inspired by a Flag


I know, I know, my hand painted stars are poop. But I haven't acquired every color of star glitter yet and my "white" is basically just clear. I love the American Flag! It's my favorite, but I do it quite often, (also red white and blue). My boyfriend Kevin suggested I do the Confederate flag, and I thought it would be a great idea but since I didn't want to paint the same flag on every nail so I incorporated the orange and blue "01" to mimic the side of the Dukes of Hazzard car! Smart, huh? That orange ^^^ is Sunny Side Up by Wet N Wild. I've bought it so many times because I think it looks nice with my skin color... I haven't used it in months, but brought it back to life with some nail polish thinner.

If anyone is wondering why I'm posting 1-3 challenge posts a day... it's because I was sick of the challenge like 3 days after I started it and I'm trying to finish it as soon as possible! I haven't even had time to do any awesome Halloween nails-- It's almost Halloween..!

Also, follow me on my Twitter I'm still trying to figure out how to use it!

Tuesday, October 18, 2011

Huge Post: Haul, Swatches, Reviews... (Pic Heavy)


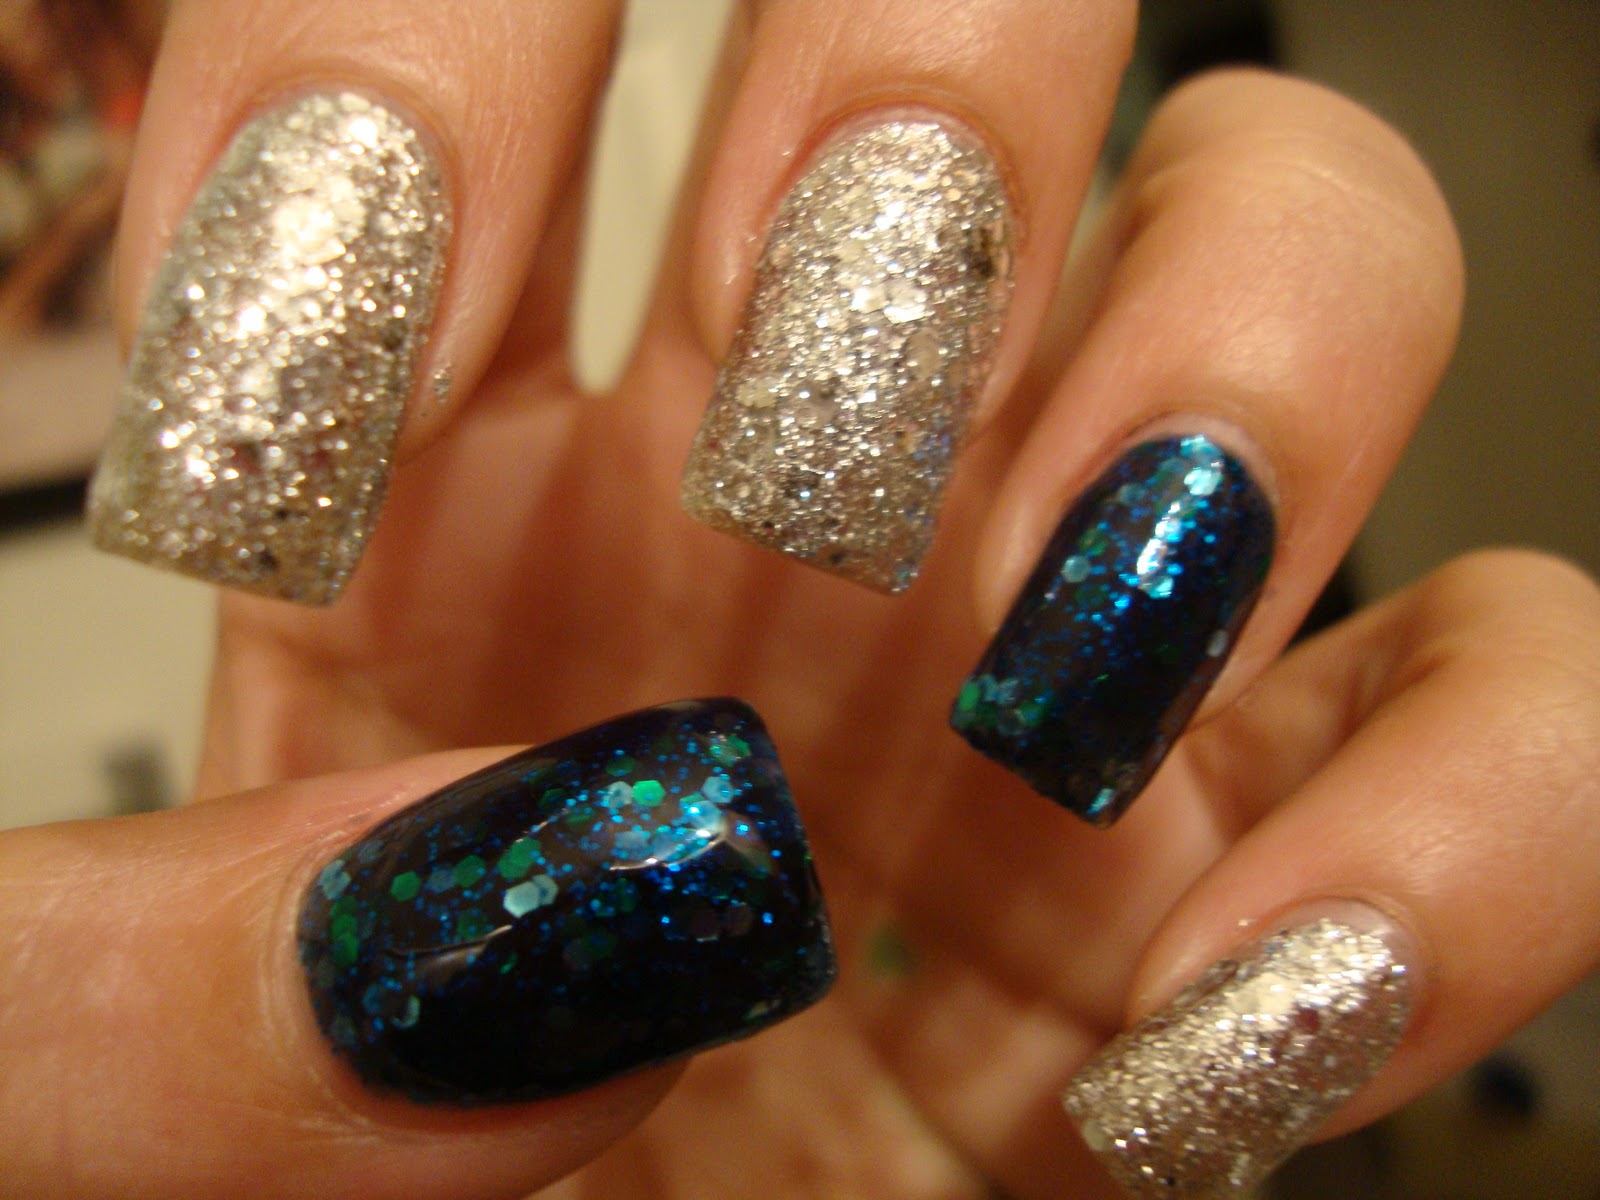
This is OPI's "Crown Me Already" from the Miss Universe Collection (the silver and large hex glitter). And the blue is "Across The Universe " by Deborah Lippmann.


OK let's start with 'Crown Me Already': I'm not sure if it was just this bottle, it's my friend Megan's and she ordered it online and she said when she recieved it a little bit had leaked out a bit. Not sure if it was a little think because of the insane amount of glitter, or because of the leak, but it was pretty hard to apply, and seemed to PUSH more polish out of the bottle each time I put the brush back in. I love the glitter, love the sparkle, but it was pretty hard to smooth out the texture, even with Seche Vite top coat. I also used a toothpick to push the large hexagon glitters around to keep my cuticle line clean looking.


"Across the Universe" is a dream glitter polish. It only took 2 medium coats to opaque and despite it being loaded with hexagons, it went on smooth, and had a jelly-like finish. It was smoothed out instantly with only one coat of Seche Vite. This is also Megan's polish. I got to swatch these while dog-sitting her super awesome golden retriever, Lady. Hey Megan!


YAY 3D acrylic! I'll go into details about that further down the page, as this is a swatch review for Essie's "Raise Awareness". It's Essie's breast cancer awareness pink and it is a lil tricky. I did read another review of this polish saying it was streaky and it is. I feel like when I'm painting tips it's even streakier vs. whole nail application. So this is two coats. I love the color, it would be less streaky with 3 coats, but I don't like to have heavy looking tips. I think that this polish would be less streaky in 3-4 months as it ages and becomes a little thicker.


Here is my pink nail drill I just got yesterday from Beauties Factory. Check it out here. I got it for about $25, and actually this is my replacement drill for the one I just got last month and BROKE. Now for this review I would like to make it clear that I BROKE the drill the first time. It did not come malfunctioning. Good news: the BF pink drill has a one year warranty, and this one was sent to me for $10 fee and I got to keep my other drill, it's cable, and drill bits. As for it's power: it goes up to 20,000 RPM (super fast and powerful) but so far I haven't had to use it at it's max speed; it does the job on medium. I've successfully filed a nail I had to put on today, and carved out the moon tips from my squared off nails. It did a fine job, my tips are sharp and more defined that with my previous battery powered drill. See above, the moon tips in my Essie "Raise Awareness" pictures. The only down side I have seen with this drill so far: it gets pretty warm in my hand after long use, and once it has overheated and slowed down. I turned it off for about 5 minutes, and was able to use it just fine again. I would reccomend this to any beginners for use on home acrylic application. And these are my acrylic brushes that I got JUST for doing 3D kawaii japanese nail art!!! and this 12 color set of acrylic powder. The colors are pretty random, but I'm not too picky about that right now these are just for practicing 3D stuff. I only paid about $2.50 for the 5 brush set (free shipping) and $6 or so for the acrylics also free shipping. It only took about 2 weeks to get here from China, and they are good enough quality to do a few little bows and flowers.


The website is here and it's insanely cheap for decent quality nail stuff like rhinestones, glitter, etc. So you should DEFINITELY check it out. Free shipping from China to US and came in a super decent amount of time. The comtainer that the acrylics came it was a little dusty (as shown) but I just dusted it off with a paper towel after I saw how yuck it was in the photo. None of it was spilled in shipping, but it was just a little dusty with powder. The brushes are super cute and the bristles are a nice soft sable hair for acrylic application, and they clean as well as my expensive ones from Sally's.


Well, if anyone read this whole thing, kudos to you, and I hope this was helpful for someone!


30 Day Nail Challenge - Day 24 - Inspired by a Book


 My "Inpired by a Book" nail art is of course inspired by this beautiful copy of Arabian Nights. This hardcover came out with a huge selections of all the classics, all with beautiful artsy covers. I got this for Xmas from my boyfriend Kevin :). It's blue, gold, and white intricate cover was super fun to recreate on my nails and looks crazy!


Thursday, October 13, 2011

30 Day Nail Challenge - Day 21 - Inspired by a Color

For "inspired by a color" I was inspired by my hair color! My hair is Ion Color "Darkest Brown" with a chunk of Manic Panic "Atomic Turquoise". It's a pretty simple design, as my hair is pretty simple. Just black tips, with 3 streaks of Sally Hansens "The Real Teal" on one side. But matches my hair perfectly!!

Saturday, October 8, 2011

30 Day Nail Challenge - Days 14 & 15 - Flowers and Delicate Print


I'm so behind! Here is Day 14: Flowers, I used Jesse's Girl "Baby Cakes" to sponge on the tips and then white a blue flowers just like in my purple post.

And here's my delicate print - I was on the phone so I got this idea from Erin but did a poop job- and I used Mink Muffs by Essie to load on a thick basecoat and while it was still wet, I pressed on little lace pieces I cut out. It probably would have looked better with topcoat, but I was kinda in a rush - just like I am right now because I'm still on the phone! Peace!

Thursday, October 6, 2011

30 Day Nail Challenge - Day 13 - Animal Print - Fish Scales

 I attempted to try something new for "Animal Print"  day because I love animal prints, and I've done it all. Zebra, leopard, cheetah, giraffe, tiger, and snakeskin from the "Metallic" day challenge. So this time (inspired my a mermaid/siren chalkboard drawing at starbucks) I wanted to attempt FISH SCALES. I used the same technique from the snakeskin nails: I tighty held a piece of lace on my nail and sponged on the top color. I used Nicole by OPI "Repect the World" for the French, and NYC "Big Money Frost" and a silver striper to sponge over the lace. Sometimes it looks like fish scales, sometimes it just looks frosty and unkempt. But I wanted to try something new as it is a challenge. Maybe someone else can do it better! I'd like to see another attempt at fish scale nail art. Lemme know if you see some!